You’re ready to start your seeds indoors. Seeds, check! Supplies, check! Now what? Today’s post walks you through exactly how to start your seeds indoors.
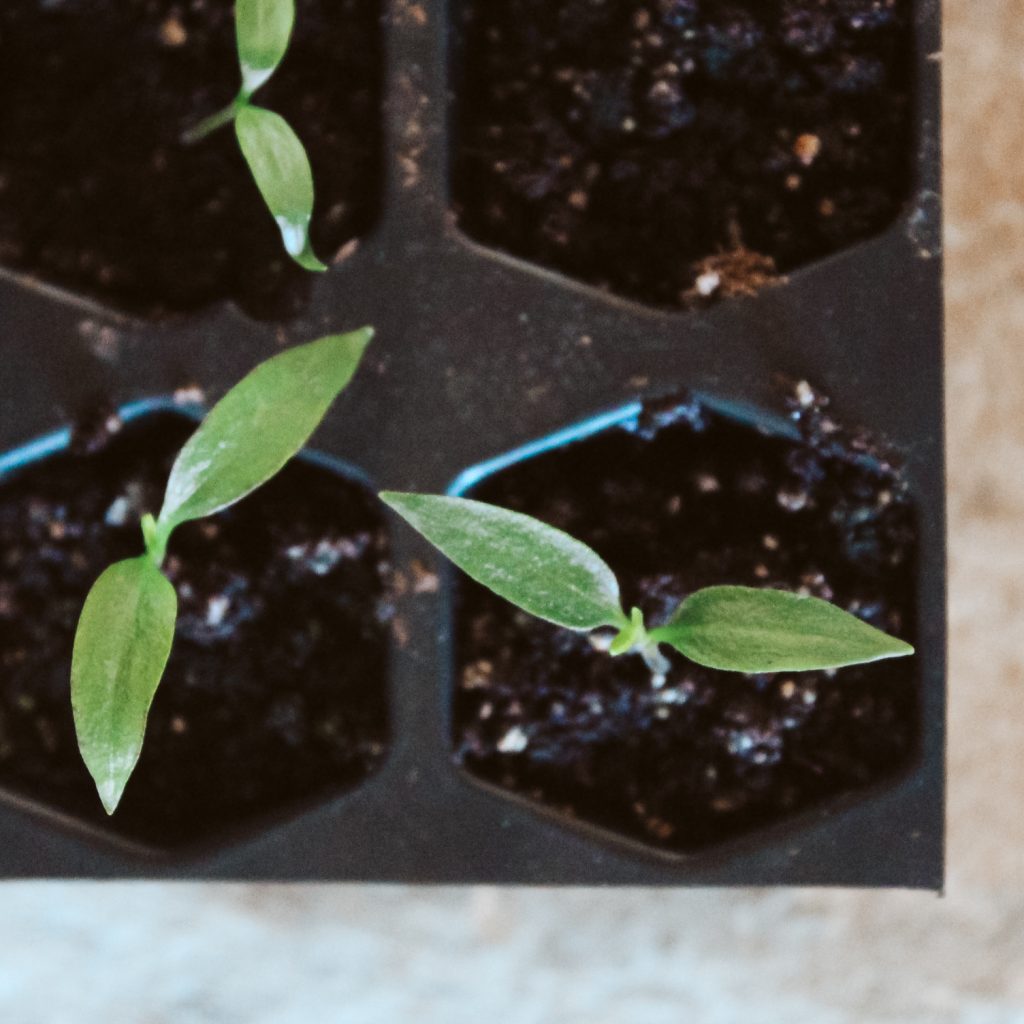
I did a poll on my Instagram stories asking if most of you gardened. I had many say yes which was so exciting for me to hear. Then I asked if you ever started seeds indoors and I was so surprised to see that half the people that garden do not start from seed.
Furthermore, I wanted to find out why so many hadn’t started from seed before. The two common answers were: no space and not enough light. We can fix that!
For those who don’t have the space, let me reassure you that I put it in the nook of my kitchen. It’s not the most aesthetic thing to look at, but I don’t really care. I’d much rather have home grown food than worry about what others think of my space. I threw wire shelving up and it’s ready for seedlings! I probably couldn’t bear to stare at it all year, but it’ll only be up a few months.
Lastly, if you don’t have enough light, the easiest solution is grow lights. I’ll share how I use them in today’s post.
Go For It!
As much as social media can be a good thing, it can equally be a bad thing. For me, it’s easy to get wrapped up in all the homesteading accounts. They have so much more experience than me and I have feelings of inadequacy. That inadequacy turns into overwhelm and I tend to stop before I even try.
Here’s the thing, we all start somewhere. We cannot compare our journey to others because we’re all at different parts of our journey. I would never expect my daughter to do the same task as me and to do it just like me. I have 30 years more experience than her!
I don’t think you’d expect your child to be as skilled as you either.
Are they capable? Yes! And I will always encourage her to try. Will it be perfect? No! Give YOURSELF that same grace too, especially in the garden. I do not like when people doubt their gardening abilities. Believe me, I used to think of myself as a black thumb. But if I’m being honest, I didn’t really try and seek out any information about it. Once I did, everything changed. As long as you have the motivation and curiosity, you’ll figure it out too!
Learn From Your Mistakes
Before I get into the “know-how,” I feel it’s important to share the real side of gardening. You WILL make mistakes. Maybe from past trauma in your life you can’t bear to make that mistake. (Or maybe I’m just describing myself.) But find comfort in knowing that even the most experienced and expert gardeners and homesteaders have losses. Their best tip or advice would probably be to grow more than you think. That way if some things don’t make it, it still looks like you’re doing well 😉
In the garden, you do have some control and learning the ins and outs can help remedy SOME of the things that can go wrong. But in the end, God is in control. Factors such as weather and pests can happen leaving you with a loss. Can we just admit that it’s normal?
On top of that, the mistakes you make in the garden are some of the biggest lessons you’ll learn. My recommendation is to JUST DO IT! I didn’t not know anything and everything that had to do with gardening when I started. But I did it anyway, and as problems arose, I researched and learned. Each year you’ll get better and better.
What Did I Learn From My Mistakes Last Year?
I’m going to get really honest here and share some of the things I learned from last year after my mistakes.
- Wait a couple weeks after your last frost date to plant your seedlings outside. The last frost date is a suggestion and doesn’t mean that a frost won’t happen after. I lost my peppers, tomatoes, basil, and marigolds because a frost happened a few days later than expected.
- I’m going to stake my pepper plants. Sure, the variety depends on whether you need it or not, but the pepper plants I grow eventually flop over because the peppers are so heavy.
- Pests are the bane of my existence. I thought I could just spray some homemade natural pesticides on the plant and be good. I was wrong. My plan this year is to do morning walk-throughs and pick them off by hand this year. I’m hoping that extra attention will help.
You’re Ready To Start Seeds Indoors, Now What?
You have your seeds picked out and all the supplies for starting your seeds indoors. Now what? Now you go for it and let’s go through it together!
Not All Seeds Are Created Equal
I want to preface this post and say that the tips I’m about to share DO NOT apply for every seed out there. Different seeds call for different instructions.
For instance, I don’t recommend starting ALL your seeds indoors. Root vegetables are best to be sown directly in the ground.
That’s just one example, so to be sure, consult your seed packet for all the information you need for planting.
Starting Seeds Indoors Video
STARTING SEEDS INDOORS Step #1: Gather Your Seed Starting Supplies
Let’s check and make sure you have what you need:
- Seeds
- Soil
- Containers
- Tray
- Lid
- Shelving for seed trays
- Grow Lights <— you will not necessarily need this when germinating your seeds, but again check your seed packet to see if the seed needs exposure to light or not for germination.
- Heat Mat
STARTING SEEDS INDOORS Step #2: Check your Seed Packets
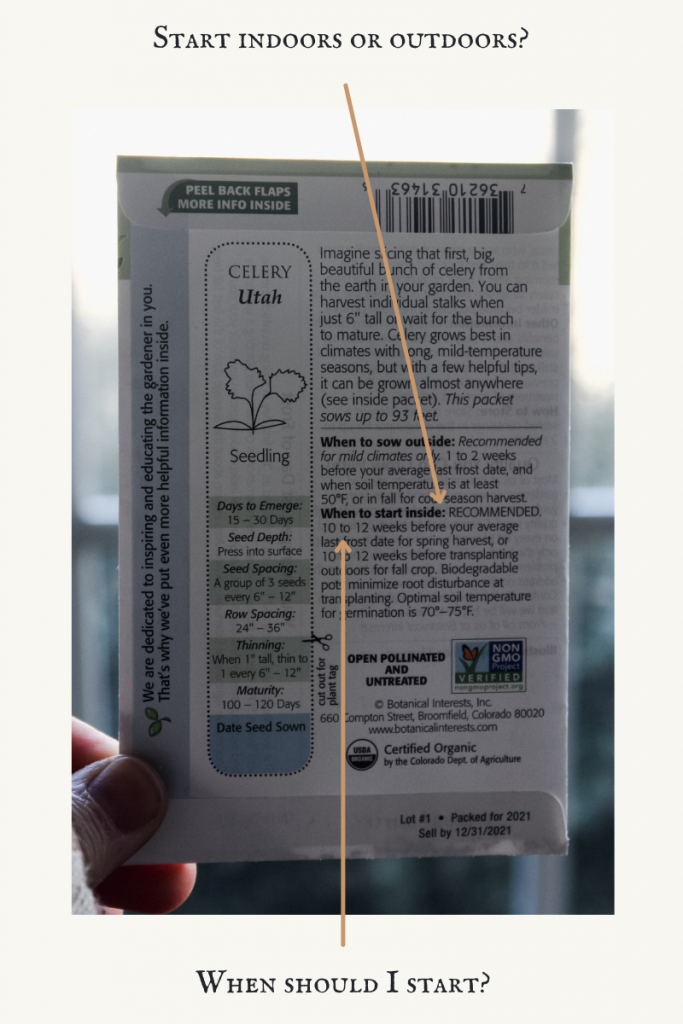
As I mentioned before, always consult your seed packet. A few things to double check before planting are:
- Is it recommended to start directly in the ground or indoors?
- How long before your frost date should you start the seeds?
- Does it need cold stratification?
- Does it need light to germinate? (Usually it does not).
STARTING SEEDS INDOORS Step #3: Schedule Your Calendar
Now the really tricky part of planting is that each one will need to be planted at different times. Things like peppers need to be started 8-12 weeks before your last frost date, while other things like lettuce only need to be started 4-6 weeks ahead of the last frost date.
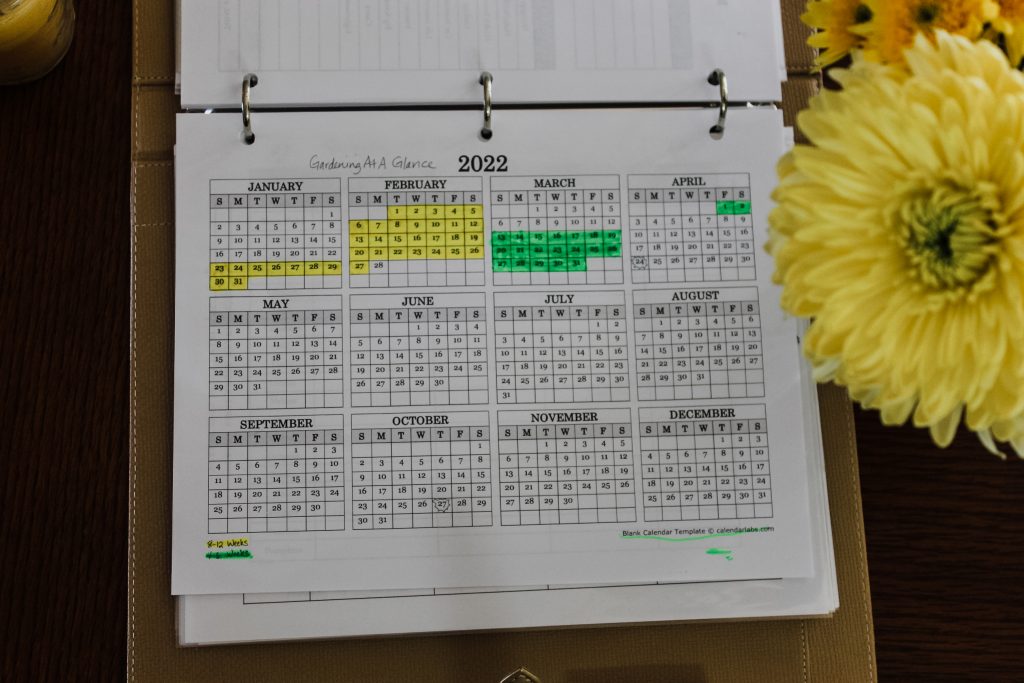
I saw this from Jill Winger’s blog, Old Fashioned on Purpose, and I loved the simplicity of it! She prints out a “year-at-a-glance” calendar.
She highlights on the calendar when things need to be started. For example: seeds that should be started by 8-12 weeks from the last frost date she highlights in one color; for seeds needing to be started by 6-8 weeks are highlighted in a different color, and seeds started 4-6 weeks ahead are given another color.
That way when you look at the calendar, you know exactly whether things need to be planted or not.
To figure out when your last frost date is, click here. Simply plug in your zip code and it will give you an average of your frost dates.
Bonus Tips:
- When planning around my last frost date, I tack on another couple weeks. As an example, my last frost date is scheduled for April 10th. This is just an average, so be aware that mother nature is unpredictable, and frost can STILL in fact happen later. So, I will plant a couple weeks after April 10th to be safe. For a schedule I’m comfortable with, I’m starting April 24th. Your seed packet will also inform you on whether the plant is frost tolerant or not. If it is, then you can have comfort in knowing you can plant that, and it won’t be affected if a cold front hits. Otherwise, plants like tomatoes, basil, peppers, etc. will die so be sure to wait until you’re for sure the frost is done.
- If the seed packets give a range to when it should be planted (i.e. 8-12 weeks) I try my best to plant the earliest time possible. That way if things don’t germinate, I will know in enough time to be able to try some more plants if need be.
STARTING SEEDS INDOORS Step #4 Mix Your Soil With Water
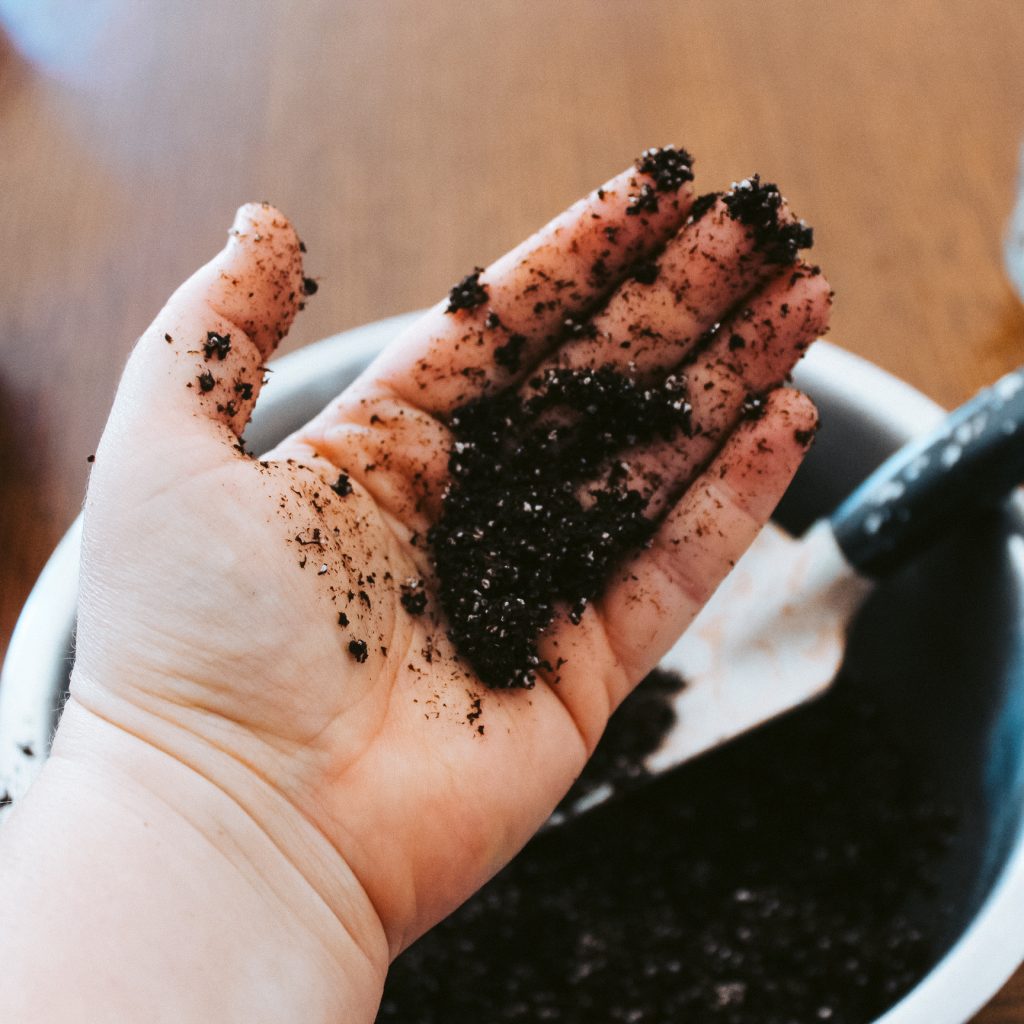
When it comes to germinating seeds, the key is in the moisture. Mixing your soil with water is something I do before I start. Play with the soil with your hands to see how wet it feels. As you can see in the picture, it should definitely be sticking to your hand.
Obviously, I don’t measure the ratio of soil to water. If you mess this up in the beginning, you’ll know within a few hours by how the lid looks. If you’re not getting any condensation you’ll know you didn’t add enough water. I’ll go into that further in step #8.
STARTING SEEDS INDOORS Step #5: Add Soil To Your Containers
Once your soil is nice and mixed and feeling moist, you can get your containers and start adding the soil. If you have a large tray full of many compartments like I do, you’ll want to add a pile of soil to the middle. With the excess soil, start spreading that outward toward the edge of the container.
You want enough airflow throughout the soil so no need to pack it in.
STARTING SEEDS INDOORS Step #6: Add Labels & Seeds To Soil

If you’re new to gardening, labeling is probably a good idea until you start to become more familiar with the look of the plants. I find that after a few years of familiarizing myself with them, that I don’t need to as much. This is completely up to you, but again it’s great for beginners or even seasoned gardeners who have a lot of varieties they want to keep track of. A simple popsicle stick is great for labels!
As far as adding the seeds, you do not need a deep hole to house your seeds. Normally I’ll have my daughter go through each cell and make a little indent with her finger. This should be plenty of space for the seeds. Of course, be sure to check the seed packet for specific instructions. You may see that some seeds are better right on top of the surface.
Refer to your seed packets for suggestions on how many seeds to add to each compartment. Sometimes I’ve noticed the packets will not have the information, and in that case, I’ll add 2-3 seeds for a better germination rate.
If you happen to get a couple plants that germinate in one cell, it’s an easy fix. Later on when the seedlings get bigger, you can always put the extra plant into another cell.
Another tip I’d have is to plant more seeds than you want for your garden. Many gardeners do this. If you happen to have more plants in the end that’s a good problem! You can gift them, sell them, or throw them in the compost.
STARTING SEEDS INDOORS Step #7: Top Seeds With Soil
You don’t need much soil to top the seeds with. I’ll usually take a handful of soil and sprinkle over the top to make sure I can’t the seeds. Remember, don’t pack the soil down!
STARTING SEEDS INDOORS Step #8: Add Lid For Greenhouse Effect
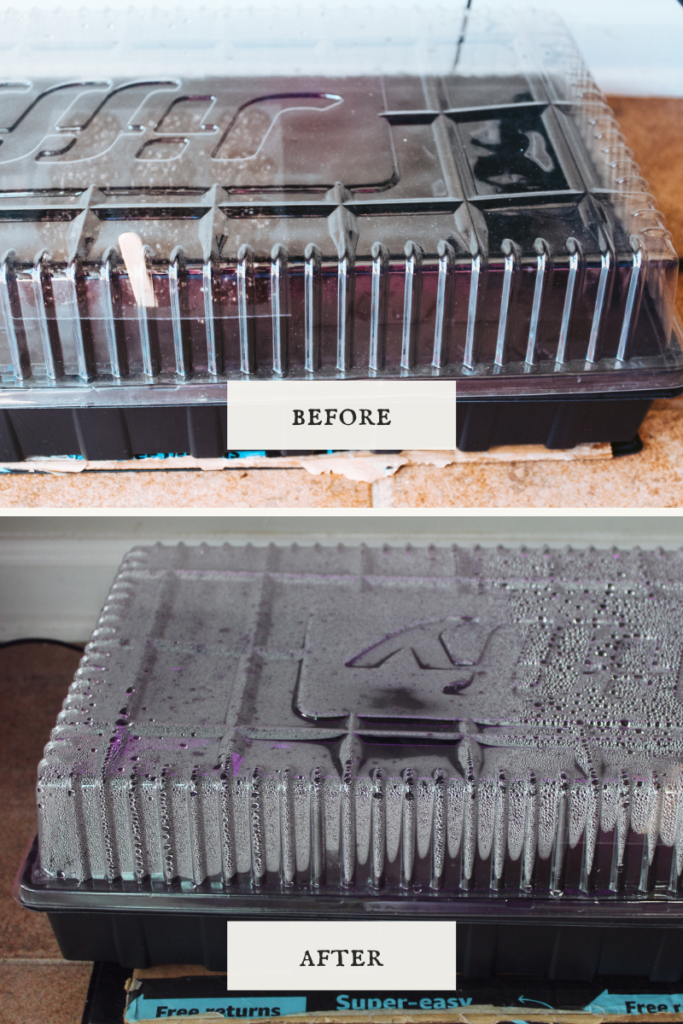
Once you have your seeds set up, place them in the tray and add the lid to make a mini greenhouse. This lid is going to keep the moisture and heat in which is the ideal climate for your seedlings.
You know you have the right conditions for your seedlings when the lid looks fogged up and you have condensation on it. You can see in the above photo; the first lid is right after everything is set up. It’ll take a few hours for your lid to show signs of having enough heat and moisture.
The second photo is the day after. This is a great sign that I have the right environment for the seedlings. If you don’t have that condensation or fogginess than add more water. Sometimes I simply had a little water to the tray or with a mini spray bottle spray the soil to get that extra moisture. Otherwise, it’s not warm enough and you may have to consider the next step…
STARTING SEEDS INDOORS Step #9 (Optional): Place Heating Mat Under Tray
This all depends on where you’re placing your seedlings. I keep mine in my kitchen and during the cooler weather that’s usually around 67 degrees. Your plants should generally be okay in a temperature like that, but a heat mat might speed up the germination time. I find I have more comfort in having the heat mat.
If you’re lid isn’t fogging up then you may want to consider purchasing a heating mat.
My Seeds Have Sprouted! Now What?
Congratulations! Each year that I wait for a seed to sprout I always second guess my ability. But it always works out and I’m confident it’ll work out for you too.
When you start to see little sprouts, take off the lid and turn off the heat mat.
This is a good time to get it under some grow lights.
Tips For Grow Lights
- Make sure your lights are 2-4 inches to the plant. Any farther away and you may notice your plants reaching for the sun and getting really tall, quickly. This just means they’re wanting more light and getting those grow lights close enough will prevent that.
- Because you want to keep it 2-4 inches from the plant, keep in mind that your plants will be growing. That means you’ll want the capability to adjust the positioning of your grow lights. I’ve tied my lights and will adjust the knots as they grow. I’ve also seen people put boxes under the seed trays to adjust the height that way.
FREEBIE
Pin It For Later
certainly like your website however you need to take a look at the spelling on quite a few of your posts. Many of them are rife with spelling problems and I in finding it very bothersome to inform the reality however I will certainly come back again.